The AR-15 is a popular semi-automatic rifle known for its versatility and reliability. Whether you’re cleaning, maintaining, or customizing your AR-15, knowing how to disassemble it properly is essential. This detailed guide will take you through every step of the disassembly process, ensuring safety and efficiency.

Image: wiringdiagramopal.z21.web.core.windows.net
Importance of Proper Disassembly
Regularly disassembling your AR-15 is crucial for maintaining its functionality and preventing malfunctions. It allows for thorough cleaning, lubrication, and inspection of components, ensuring optimal performance. Additionally, it’s a necessary step before customization or repair.
Safety First
Before beginning the disassembly process, ensure the firearm is unloaded and the safety is engaged. Always handle the weapon with respect and follow established safety guidelines, including wearing safety glasses and working in a well-ventilated area.
Step 1: Remove Magazine and Clear Chamber
Start by removing any magazines from the firearm and dropping the bolt to verify that the chamber is empty. Double-check the chamber again visually to ensure it’s clear of any rounds.
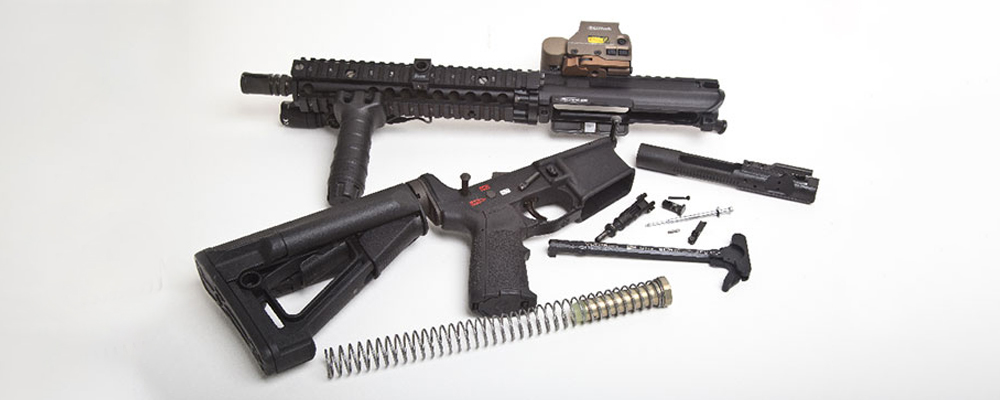
Image: newsmilitary.com
Step 2: Separate Upper and Lower Receivers
Push the takedown pins forward, located on the rear of the receiver. Once the pins are disengaged, gently lift the upper receiver off the lower receiver. Place them on a clean, flat surface.
Step 3: Remove Charging Handle
Pull the charging handle fully to the rear until it stops. Lift the charging handle up and out of the upper receiver’s groove.
Step 4: Remove Bolt Carrier Group
Ensure the bolt carrier group (BCG) is fully forward. Pull the charging handle slightly to the rear, allowing the BCG to clear the front of the upper receiver and pull it straight out.
Step 5: Disassemble Bolt Carrier Group
Place the BCG on a flat surface and use a punch or small screwdriver to push out the two gas key roll pins. Once the pins are removed, carefully lift the firing pin out of the bolt carrier. Then, separate the bolt, cam pin, and firing pin retaining pin.
Step 6: Remove Forward Assist
Depress the spring inside the forward assist assembly using a punch or screwdriver. While holding the spring down, pull out the forward assist roll pin. Remove the forward assist assembly and spring.
Step 7: Remove Dust Cover
Push the dust cover forward off the upper receiver.
Step 8: Remove Ejection Port Cover
Depress the ejection port cover spring to disengage it from the upper receiver. Lift or pull out the ejection port cover.
Step 9: Remove Handguard
While holding the handguard, press the delta ring forward to detach it from the front sight base assembly. Rotate and lift off the handguard.
Step 10: Separate Lower Receiver Components
Hold the lower receiver vertically with the trigger guard facing up. Depress the rear takedown pin and remove the pistol grip. Then, remove the stock by sliding it out of its housing.
Step 11: Remove Trigger Assembly
Push the front takedown pin out of the lower receiver. Insert the point of a punch or tool into the hole on the trigger guard and pull down to release the trigger assembly. Carefully lift the trigger assembly out of the lower receiver.
How To Take Apart Ar 15
Conclusion
Congratulations! You have successfully disassembled your AR-15 rifle. Remember to reassemble the firearm in reverse order, following the same steps carefully. By understanding the disassembly process, you can maintain your rifle effectively, improve its performance, and ensure safety.
